Creating Emotional IR Images From Your Heart
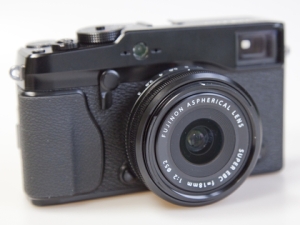
Infrared photography means so many things to me… I have a popular Infrared Educational Blog at http://infraredatelier.wordpress.com/ where I have shared all of my secrets surrounding Infrared photography for several years, I have a book in work on Infrared photography, but MOST IMPORTANTLY, I have practiced the art of creating emotionally charged Infrared images for longer than I can remember, even as long as 45 years ago with film. Here, today, I will disscuss with you the technical details of using your Fuji X Pro 1 camera system to create these emotionally powerful images as well.
Understand this, you can create Infrared images several different ways:
- Film: Rolli makes a great 720nm IR film in many different formats that with the addition of a 720nm filter on your lens will create great IR images at 100 ISO, and with no filter great B&W images at 400 ISO!
-
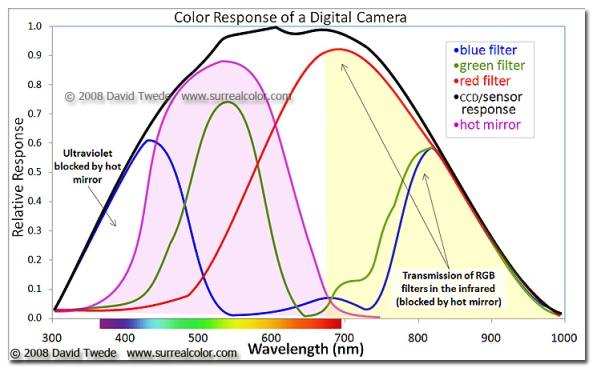
Standard Digital COLOR Camera: With the addition of a 720nm or 850nm IR filter on your camera lens your camera can capture Infrared images. There is a tradeoff to this way though because each camera manufacturer places some sort of UV/IR blocking filter over the image sensor that allows only visible light to pass through. Some of these filters are weaker than others and these cameras make for a system that will do well in Color and OK in Infrared with reasonable IR exposure times around a second or two. Others have a strong filter allowing only a small amount of IR energy to pass. These require VERY LONG exposure time in order to overcome this filter. The Fuji X Pro 1 is one of the cameras with a weaker filter! This is exciting because it enables you to easily create IR images with an unmodified camera system!
- Converted Infrared Camera: This type of system is the most popular by far. There are 2 types:
- Full Spectrum conversion: The internal UV/IR blocking filter is removed and replaced with a clear glass filter. You can then program the camera with an external IR filter in any range from UV to Color to Infrared! This is the most adaptable IR system but costly because IR filters for your different lens sizes are expensive!
- Dedicated Infrared Conversion: This type has the internal UV/IR blocking filter removed and replaced with a specific IR pass filter and will create IR images in that band only.
So with regard for the Fuji X Pro 1 system we are going to discuss option #2, the standard color camera with an external IR filter attached to its lens. But you ask: “What filter can I use?”. Well since we are not modifying the internal UV/IR blocking filter you must understand that the camera will pass normal visible colors as well as IR if the external filter allows it. This is both good and bad! If you were to install a 590nm IR filter on your lens the camera, it would see everything from 590nm up to 1000nm. But because the internal UV/IR blocking filter allows much more visible light than IR through, it will poison the exposure metering system. It is going to see the vast majority of the light as color (red) and expose for that rather than the IR portion. So attempting to do this will cause very unreliable exposure and great frustration on the part of the photographer.
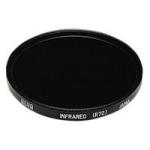
What we need is to attach an IR filter that blocks ALL of the visible light and only passes IR to the sensor! So it is best to choose a 720nm IR pass filter to your lens like the Hoya R72 or a 800nm B&W IR only filter like the B+W 093. The higher you go in nm the longer the exposure time will be…
Now, knowing that we are going to use the 720nm filter which will only pass IR energy from 720nm and up while blocking ALL of the visible light our metering system will now function as it should!
Considerations of problems that must be overcome within the X Pro 1 to get good IR images
- Even though the Fuji X Pro 1 has a weak UV/IR blocking filter there is still one there. Exposure time at a normal low noise ISO of 800 and below will still require an exposure time too long to hand hold and still get sharp images. Most of mine were at 1/30s and longer.
- Yes, the X Pro 1 works well at high ISO settings, but in IR the camera will still create noise in the dark areas of the image.
-
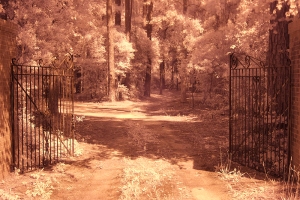
Fuji X Pro 1 with a custom WB right out of the camera. This is as close as you can get but will still generate a great image.
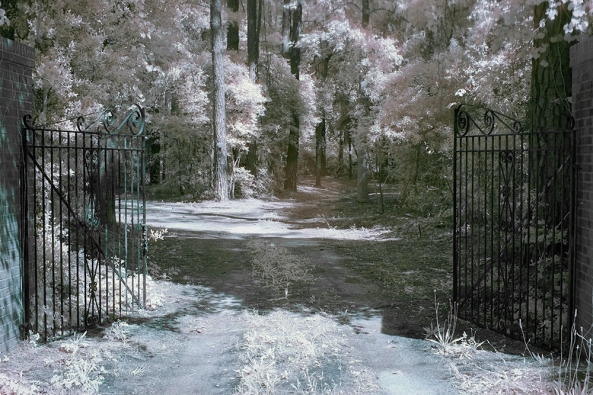
White Balance is IMPORTANT when shooting in IR! The X Pro 1 will NOT reliably do a custom white balance with the 720nm IR filter installed. But it does have a manual Kelvin White Balance option, so when shooting IR you need to go to this sub menu in the WB settings and set it to 2500K. I have talked to others doing this and have heard that they also take away green as well in the menu. I personally think that this is unnecessary and by leaving the green neutral you will get more pleasing Faux Color images. A properly white balanced image taken on your camera has s slight reddish cast, the sky should be bronze and the green leaves should have a monochromatic feel with a bluish cast. (more on this later) An improperly white balanced camera image will be pure dark red. While you can still use this image in post processing the lack of a good white balance will throw off your exposure system. Read your camera manual on white balance and understand it!
- Longer shutter speeds need a tripod to get sharp images!
- Remote shutter cable to cut down on camera shake!
- The Hoya R72 720nm IR filter will generate good Faux Color infrared images some of the time, but good B&W images all of the time. Keep this in mind while shooting and plan to always explore both options in post processing!
- Faux Color IR images require a channel swap in post processing. ONLY the Photoshop family (CS through CS6) has this function built in! Photoshop Elements has an optional plugin called Elements Plus that you can purchase to do this. Lightroom and Aperture DO NOT have this function!
Ok, enough of this for now. Lets talk images…
The Hoya R72 IR filter is almost black. You can see very little through it but don’t worry, the camera can see through it just fine! You can find these filters on Amazon for about $58.00 in 52mm. There are a lot of other filter companies out there that make these, some good some not so good… I trust the Hoya!
Mount the filter on your lens, set the ISO to around 1000 and put the camera on a tripod. Make sure that you have properly set the WB either as a custom on or as a Kelvin entry. If you choose custom, the camera will require a lot of light to due this properly. Use green grass to generate the custom white balance.
I like to use the optical viewfinder rather then the LCD or EVF for shooting in IR. Choose and frame your subject carefully. Hmm, a word about composition…
There are three items that can make IR images really powerful and full of emotional impact:
- Sky with clouds!
- Water reflections!
- Green Leaves!
The more of these items you can get in your images the better they will be! Here is an example…
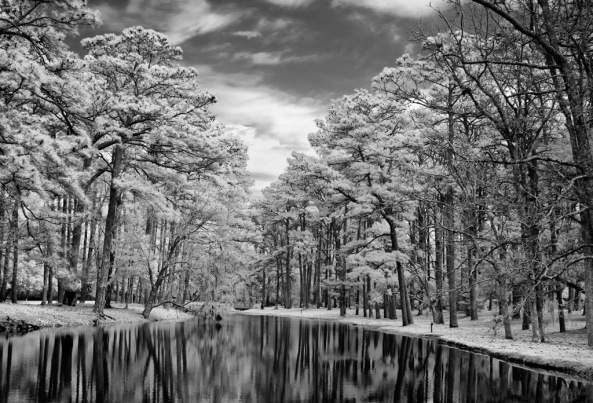
Clouds, Water and Leaves! What more could you ask for? While not done on a X Pro 1, this image could just have well been so!
As you can see, the sky, reflections and leaves create an emotionally packed, etherial image that draws your viewer into it! Keep these three compositional elements in mind as you go forth and create your images!
Exposure Issues…
OK, last part of this post! There are a few small exposure issues that you need to be aware of while doing IR work. They are:
- Red Channel over exposure: The RED channel will aways expose a stop or more higher than the blue and green. After you have taken the image and see the preview on the LCD panel look at the histogram. It only displays the combination monochrome histogram and if it is close to being overexposed you will get better results by dialing in -1ev exposure compensation and re-take the image. This is due to the red channel being more sensitive to infrared and causing the overexposure. You can really see this during the RAW conversion or in photoshop during post processing by looking at the RGB histogram there.
- Hot Spots: Some people have reported hot spots in the center of their images when using the 18mm lens. I have NOT personally seen any evidence of this with my system as of yet. Hot spots are areas in the center of each picture that is usually a stop brighter. They are caused by light bouncing back and forth between the sensor and the lens elements. These are lens specific and very little can be done while taking the picture to stop or reduce them. BUT, the aperture can have a drastic effect on them! If you see these then try adjusting the aperture and review the results, you just might be surprised! You MUST ALWAYS use a lens hood when shooting in IR. This will also help stop hot spots by stopping light from striking the objective lens at extreme angles then bouncing around inside the lens between elements. If you do notice the hot spot you can remove it in post processing very easily by using Nik Filters Viveza. You use the selection point by placing it in the center of the spot and then reduce the brightness!
OK, this is enough for today. The next post will be a detailed Post Processing tutorial that will take you through both Faux Color and B&W processing. I even have a photoshop action that you can download to semi automate the channel swap and cut down your post processing time!

So useful. I’m getting the 720nm filter in a month, can’t wait. Thanks
You are welcome. Don’t forget to visit the IR educational blog at infraredatelier.wordpress.com
Pingback: Detailed Fuji X Pro 1 Infrared Tutorial: Part 1, Equipment & Shooting! Mark Hilliard | Fuji X-Pro1 | Scoop.it
Awesome Mark. My favorite subject, and one which I used the “quirk” built into the Leica M8 to great effect. Now I have the X-Pro I am just re-learning this.
Look forward to Part 2.
Gary
Thanks Gary! Have you noticed any hot spots on your X Pro 1 with any of its lenses? I have not but have received some repots of spots…
I notice a hot spot in the middle of the first shot, have you any advice on how to avoid that? – Are some apertures better than other to avoid hotspots?
I have heard reports that some people are seeing hot spots with the 18mm lens. Which lens and filter are you using? Hot spots are caused by the IR might bouncing back and fourth between the sensor and lens elements. Aperture can have a direct impact on this and experimenting with different apertures might help. ALso the filter can affect it as well! Make sure you have a lens hood installed also. I have NOT seen this on my camera…. yet. But that does not mean that I will not as I have not taken too many images so far in IR on the X Pro 1. In post processing, use Nik Viveza (photoshop plugin) and its selection point and click on the center of the spot. Then simply reduce the brightness until it is gone!
Thanks for sharing, i was willing to use my x pro 1 for ir photography, you fill the gap in my education 🙂 cant wait to read the rest of the tutorial in photoshop
many thanks
Thanks Jex, Welcome aboard!
Thanks for the advice on the hotspot. I do notice a hotspot on your sample at the top of the page, slightly warmer spot in the centre. I get similar with my 18mm. I tried your advise and as I was converting to B&W I used the similar Nik SilvereEffects Pro plugin to remove the brightness of the Spot, worked very well indeed. I am using same Hoya R72 52mm filter here on the XP-1. Looking forward to the next part of this.
You are welcome. But, hot spots are always in the dead center of the image. Anything else is just lens flair.
Mark,
no haven’t noticed any yet, but to be fair, Ive only just started with I/R and the X-Pro1, and have only the 35mm at this stage.
I shot a bit with the M8 and either the 21/2.8 or 28/2.8, and didn’t notice any hot spots.
When you say that the channel swap is built into CS, I find I have to do this manually, is this what you mean? (I have CS4) I can’t do it in LR as you suggest.
Gary
Gary, i have a action that you can download here on the right menu that automates the swap. Go to mt ir blog site and read the posts on 590nm and you will find detailed instructions on using the last step of the action!
Hi Mark,
tried it, both from this page, as well as the processing tutorial, no go. Can you e mail me please, the address is art of the blog entry.
Gary
Sure, here are 2 different posts with instructions, each a little different…
Hi Mark,
Please humor me here. I have tried to download the action, and “felt I had”, it showed on my Mac desktop as a .tpm file, is this correct? Then, what the heck do I do with it. I tried “Loading the action” in CS4, to no avail.
To be honest, I’m not overly sure the Khomography action downloaded anyway.
Sorry to be so hopeless. I went out and tried a few shots today, like a clown I shot them on RAW, and now I have to muck with each one individually in SilkyPix to see them. It’s annoying, I like to be able to view them all at once, like I do in LR, well like I could in LR, previously.
Gary
I just downloaded it to my desktop and it worked fine. It is a .atn file. Once you save it on your desktop, start photoshop. Open an image. Bring up the actions menu, click on the little single triangle on the upper right corner of the actions window, select load action and then point it at the action on the desktop! It will now be alive inside of photoshop.
Great post Mark, thank you very much for sharing. I have been into IR for eight months and I am delighted. I use primarly an F mount system but I am considering mofifting a Fuji X PRO 1 for UV/VIS/IR and using the optival viewfinder to compose. It is annoying when using a TTL reflex UV/VIS/IR system and a 720mm filter, viewinder is not practical under some field conditions. Do you have experience with modifying a Fuji X PRO 1? have you heard of someone doing it? No problem with hot spots since I already have a nice set of non hot spot small primes (Voigtlanders mainly) adn can use them with adaptor.
Salva, I am also considering the X Pro 1 for an IR conversion. I have no idea on how to do it but Spencers Camera in Utah can do so. you can find them at:
I asked LDP LLC max max (http://www.maxmax.com/) and they said they can, I dont have the cost yet but I asked today and let you know. I also asked Life pixel (http://www.lifepixel.com/) but they said they didn´t do what is not listed on their page.
Mark,
I checked Spencers web site and could not find an X Fuji listed. I have 3 bodies, 2 xe1 and 1 x pro 1 and a couple of Omd-Olympus. One of them will most certainly get the change.
Elliot, the only ones converting the fuji X cameras is LDP ( maxmax.com ). Call them and ask for Dave.
Pingback: Detailed Fuji X Pro 1 Infrared Tutorial: Part 1, Equipment & Shooting! | Thoughts about the new Fuji X Pro-1 | Scoop.it
Pingback: Digital infrared with the Fuji X-Pro 1 | Grumpymonk :: 7 Shots
Yes thanks mark for sharing. I’ve just got a hoya r72 and found with the new xf 18-55 a massive underexposure hot spot in the middle. This increases as I put the aperture higher but is still there at f4. Will continue to test.
Have found also that Gimp can be set up as an external editor in lightroom to switch blue and red:
Thanks for the info! There are a lot of lenses out there that cause IR hotspots. I personally believe that the real problem is with the hot mirror in the camera that causes the spot. On the one converted camera I saw there were none at all, even with a lens that hat them before!
I am going to have a X Pro 1 converted soon but cannot decide on the 720 NMR or the 800 NMR conversion!
Hi Mark, why not a UV/VIS/IR or a VIS/IR conversion? I just upgraded my Fuji IS PRO with a D600 VIS/IR. It allows me to use any filter, maybe more likely to get reflections from direct sun light but allows me to do B&W from 720/800/1000 “and other” filters like the LDP XDP (very interesting filter), 580/630/660 nm or whatever. For a DSRL It is slightly less comfortable maybe, but far more flexible. For a mirrorless camera using the EVF or the screen monitor is the same!!! except for the reflections on the filter. By the way I strongly recommend Voigtlander objectives, highly flare resistant and no hot spot.
I have had several full spectrum conversions in the past and found that I got sharper better images from an internal option. I am leaning to the 800nm conversion for B&W only due to its sharpness.
By the way I´d like to get something like a XE1 in the future but I´ll wait until more manual focus support (like focus peaking) is implemented on fuji mirrorless bodies.And certeny I´ll open it, I mean I´ll convert it to UV/VIS/IR, no doubts.
Well, after these being included in the new X100s I believe that we will see them in the next versions of the other X cameras!
Pingback: Detailed Fuji X Pro 1 Infrared Tutorial: Part 1, Equipment & Shooting! | Concursos fotográficos | Scoop.it
Great post Mark. I am looking at getting a filter for my X-E1. Do you think a step ring would pose any issues?
I am intending on getting the newly announced 55-200 lens which has a 62mm filter thread, so wanted to get a 62mm filter to cover the new lens (hopefully it will works well for IR).
Justin, the step up ring is fine but you will NOT be able to use your lens hood which is a BAD thin when shooting IR. I too am going to get this lens but I do not expect to see it till late july….
Pingback: Infrarotfotos
Pingback: Infrarotfotografie ... Techniken, Tipps und Tricks ... und hoffentlich viele Bilder !
Pingback: infrared photography tutorial gimp « Learn photography
Hi. Thanks for the post. Can you elaborate on the channel swap you mention? What do you mean by that?
Don, here are some videos that explaing the entire process!
There are more just go to Youtube and search Mark Hilliard Infrared